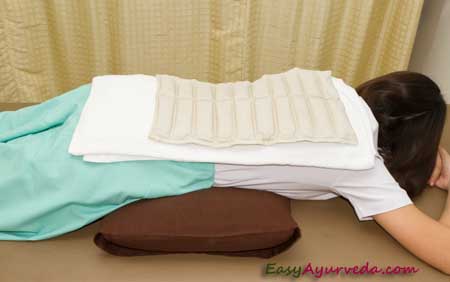
Hot Compression Therapy Types, Procedure, Benefits, Precautions
Article by Dr Raghuram Y.S. MD (Ay) & Dr Manasa, B.A.M.S
Compress therapy means pressing a pad of lint or other absorbent material on to part of the body to relieve inflammation or to stop bleeding.
Table of Contents
Types of compression therapy
A compression can be of two types –
- Hot compression therapy
- Cold compression therapy
Compression therapy is a part of hydrotherapy also. There they are called as heating compresses.
Related reading – Hydrotherapy – water therapy benefits, types
Hot Compress
Hot compresses are beneficial to cure pain or inflammation.
When warmth is provided from a hot compress, it soothes and heals the body. It helps in dilation of blood vessels. This makes easier for the blood to carry the nutrients all through the body uninterruptedly. This also helps the blood to flush out the toxins from the body.

Benefits
Benefits of Hot compresses –
- Relieves pain
- Relieves inflammation
- Increases blood circulation
- Helps the muscles to relax
- Aid wound healing
- Flushes toxins
- Helps in treating several skin disorders
- Helps in treating eye problems
- Cures Muscle soreness
- Cures Muscle spasms
- Cures Chronic joint pain
- Cures abdominal cramps
Duration
Duration of hot compresses –
Hot compresses shall be applied for 5-15 minutes depending on the nature of problem and its severity. The tolerance of the patient also should be considered. Small sessions of the said duration can be repeated once in every 2 hours for better benefit and effective healing. The frequency of hot compresses and also the quality of heat shall be decided by the practitioners of nature cure. The treatment also shall be done in their supervision.
Disadvantages
Disadvantages of Commercial Hot Packs
Hot packs are available readymade. Commercial hot packs are available but they may not be suitable for all body parts. Example, eyes may not tolerate the weight and bulkiness of a commercial hot pack.
They may also contain chemicals which can harm your skin if there is leakage of chemicals from the packs.
Therefore it is always better to prepare a hot compress at home. This is simple to make, cheap and reliable. It is safe too.
Read related: Why You Should Sweat – To Treat Disease, For Better Health
Methods of making hot compress
Methods of making Hot Compresses at Home (Homemade hot compresses)
Moist compression
Materials needed: Towel, Hot water
Method:
- Fill a large vessel with hot water (check temperature before using, it should not be boiling)
- Take a sterile cotton cloth or towel. Dip it in the hot water until the towel is totally soaked and saturated
- Wring out the excess water or else water will keep dripping from the towel while doing the procedure (while giving compression)
- Now fold the wet cloth into a rectangle
- Place the rectangular cloth in a zip-lock bag. The heat and moisture will now get sealed in the bag.
- Now, your hot / moist compress is ready. Place the compress on the affected body part for desired / prescribed time.

Dry Heat Compress
Material needed: Cooked rice, Microwave, Stove, Pan, Zip-lock bags, Sterile Cloth, Salt
Dry heat compresses are easy and convenient to use but on the other side it can dehydrate the skin. It should be avoided for those having dry skin. In these people moist warm compresses should be ideal.
Method:
- Put 3-4 tablespoon of cooked rice into a zip-lock bag. Zip it.
- Heat this in a microwave for couple of minutes.
- Remove the bag from the microwave after the scheduled time.
- Now, wrap a washcloth around the bag and use it as needed.
Alternative method:
- Heat a thick bottomed pan on the stove.
- When the pan is hot, add 1 cup of salt to it. Make the salt warm.
- Put this warm salt on a sterile cloth. Tie it into a bundle.
- The compress is ready to use.
- Once the compress cools down, once again heat the pan and place the bundle on the top of the pan until it gets warm. Use it now.
- You can repeat this procedure until the compress has be administered for advised time duration.
Hand Towel Method
Materials needed: Two Hand Towels, Zip-lock bags, Microwave
Method:
- Wet 2 hand towels with water
- Squeeze out excess water until the towels are just damp and water is not dripping around
- Put 1 towel in a zip-lock bag, but do not seal the bag
- Heat the bag in the microwave on high for about 1 minute
- After the stipulated time, carefully remove the bag from the microwave
- Wrap the hot bag with another wet towel
- The homemade heating pad is ready to use
Rice and Socks
Materials used: Pair of socks, rice, microwave,
Method:
- Take a pair of old, washed and sterilized socks.
- Fill the socks with uncooked rice
- You can also make the contents fragrant. Add small quantity of powdered peppermint, cinnamon or whichever aroma you prefer. You can also add kitchen herbs, contents of herbal tea bag or essential oils. This will get you a perfumed compress.
- For soothing experience you may add lavender, chamomile, sage or mint.
- Close the opening of the socks by either sewing it shut or tying a knot
- Heat the socks in the microwave on high for 2 minutes
- After stipulated time, remove the socks containing the rice from the microwave
- Wait till the temperature of the socks come down
- After 1-2 minutes, when the heat of the socks is tolerable, apply it to your sore shoulder or neck.
- When the temperature reduces, if needed, microwave the socks again for 1 minute and apply over the painful area.
- Try a barrier between your skin and compress. Place a towel or t-shirt on your skin where compress is to be given or wrap the compress with the said clothes. This will prevent burning skin damage. Make sure to check your skin every few minutes to ensure that your skin is doing good and in good shape as well.
Note: Uncooked beans or oats can be used along with uncooked rice
Glass Bottles
Materials needed – Glass bottle / bottles
Method:
- Fill a clean glass bottle with boiling water and close the cap properly.
- Wrap the bottle in a thin towel before applying it.
- Your hot bottle compress is ready to use. Glass bottles are more effective, especially when it comes to heat retention.
Other hot compressions
Hot Spoon Method
Materials needed: Spoon, hot water
Method:
- Warm up a metal (steel) spoon by placing it in hot water. Keep the spoon in hot water and leave it for 2 minutes. You can also keep an additional spoon as a back up so that you can use one after the other without interruption.
- Check the temperature of the spoon after removing it.
- Now place the convex surface of the spoon gently over you closed eyes. Hold the spoon in position until it becomes cold.
- Replace the spoon with the other warm spoon. Repeat the process until relief is obtained.
Uses:
- To soothe tired eyes
- To get rid of mosquito bite
Used Tea Bag Compression
Materials needed: Tea bags, hot water
Method:
- Dunk a teabag in 1 cup of hot water for 3-5 minutes. Both green and black tea bags can be used. Both are rich in tannins that have astringent properties.
- Remove the teabag from the hot water. Squeeze off the excessive water.
- Now place the warm teabag over your eye.
- Hold it for 10 minutes as a warm ‘eye compress’, you can also keep it until the bag cools down.
Benefits:
- To reduce swelling of the eyes
- To reduce the redness of the eyes
Herbal Compresses
Herbal pouches are used to give compresses to soothe muscles and to stimulate the vital organs and senses and is very popular in Thai culture and practices. The herbal compresses are made with a selection of therapeutic herbs tied up in a muslin cloth.
- Rice Poultice
Materials needed:
- Uncooked rice – 1 cup
- Lemon zest – 1 teaspoon
- Ginger powder – 1 teaspoon
- Turmeric powder – 1 teaspoon
- Sandalwood powder – 2 teaspoons
- Chamomile tea – 2 teaspoons
- Flannel cloth
Method:
- Mix all the given herbs with rice in a bowl.
- Place the mixture of ingredients in the center of the flannel cloth spread out over a flat surface or table.
- Tie the cloth into a bolus. Secure the bundle with a rubber band or ribbon.
- Heat up the pouch for 2-3 minutes in the microwave.
- Take the bundle out of the microwave.
- Gently apply it over the afflicted area where compress needs to be given, in circular and rolling movements.
- Ginger and lemon compress
Materials needed:
- Grated ginger – ½ cup
- Lemon zest – 1 tablespoon
- Sandalwood powder – ½ tablespoon
- Sea salt – ½ tablespoon
- Common salt – ½ tablespoon
- Lemongrass essential oil – 3-4 drops
- Eucalyptus essential oil – 3-4 drops
Method:
- Mix all the above mentioned ingredients including essential oils in a bowl.
- Place the mixture on a spread our muslin or natural fiber cloth
- Tie the cloth into a bundle. Secure it with a wool thread and stick it in the microwave for 1 minute.
- After removing the bolus from the microwave, press it gently against the aching muscle in small circular motions to alleviate pain. After a session you would definitely feel calm and relaxed.
Precautions
Avoid heat therapy if you are suffering from –
- Pregnancy
- Diabetes
- Poor circulation
- Heart disease
- High blood pressure
- Acute injuries (cold is preferred after an acute injury like a sprained joint), if you pull a muscle, apply ice immediately to reduce swelling within the first 48 hours. If the pain persists for several days, think of using heat to speed up the recovery.
Other cautions –
Do heat therapies always under guidance. Talk to your doctor and get your condition diagnosed properly, especially the nature of muscle and joint pain before applying hot compress.
Always keep a layer of cloth between the heat source (compress) and your skin to prevent burns.
Just Before Finishing –
In this article I have tried to give a detailed account of hot compresses which are used as simple remedies and often as effective home remedies to get rid of pains, spasms and soreness of muscles and joints. But the most important thing is that though they appear simple and easy to do, they shall be done through proper channel, under the guidance of an expert!!
Click to Consult Dr Raghuram Y.S. MD (Ayu) – Email / Skype


